
How to Build Custom Web-Based PostgreSQL Admin Panel: Step-by-Step Guide

Updated:
October 5, 2024
Building an admin panel for your PostgreSQL database using UI Bakery is one of the easiest ways to streamline the database records management and get a bird-eye view of different stats.
Whether you are a beginner or a seasoned user who worked with other tools like pgAdmin, we created this guide to walk you through the process of developing your customized admin panel with PostgreSQL integration. Let's get started.
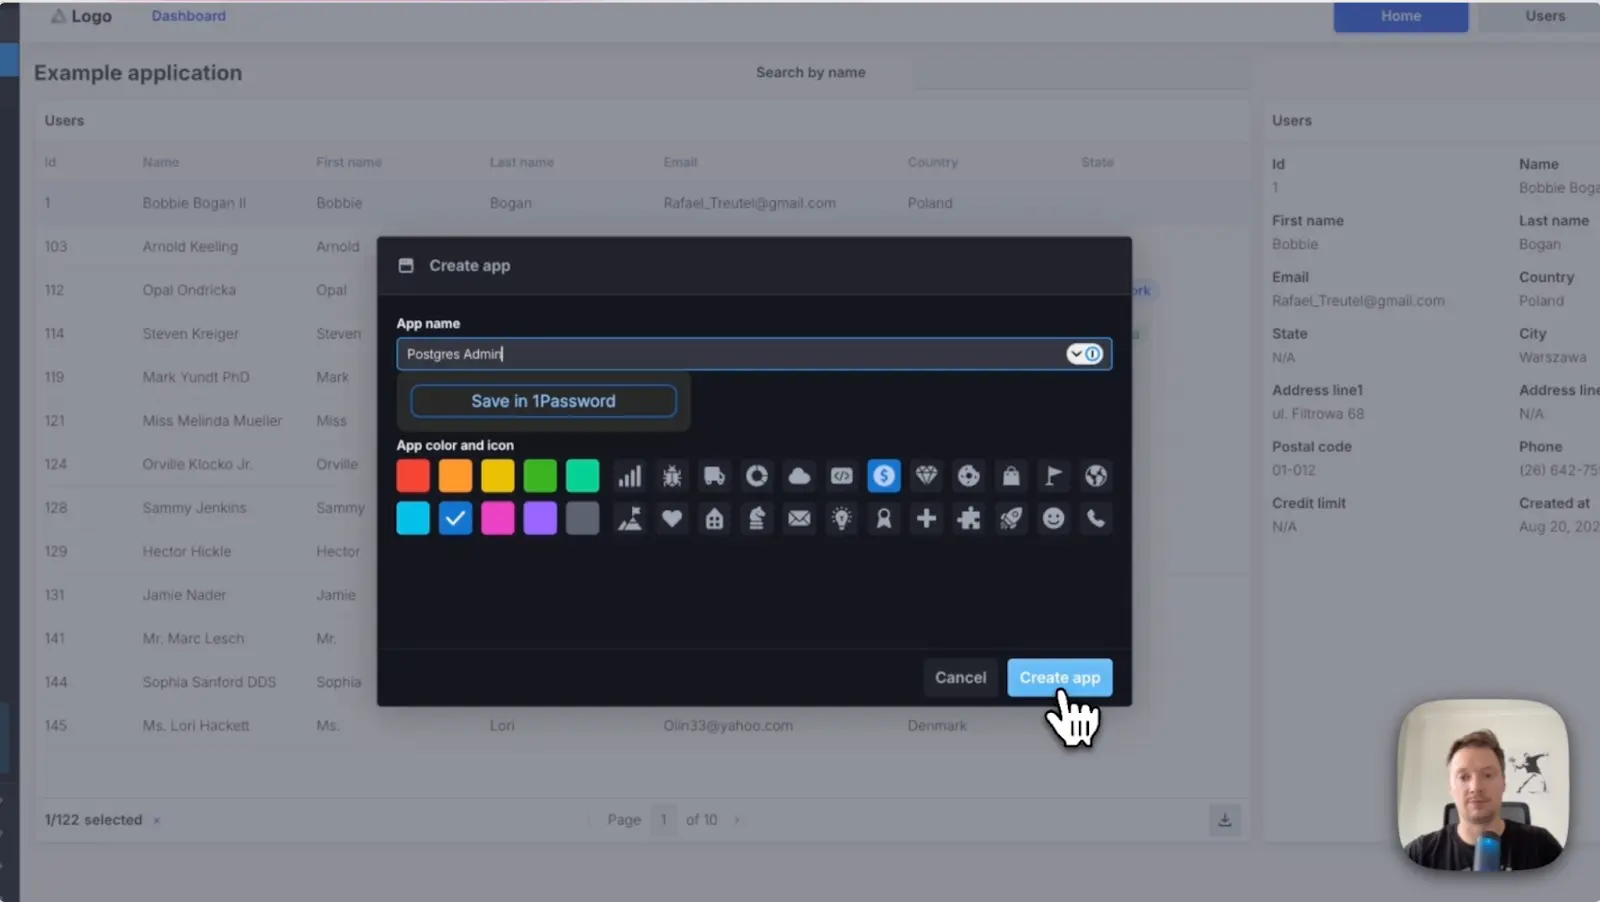
Step 1: Create a new app and give it a name
Let's assume you already have the UI Bakery account, so let's start by creating a new app and giving it a name - Postgres admin in our case. Or you can simply use pre-made PostgreSQL admin panel template and customize it according to your needs.
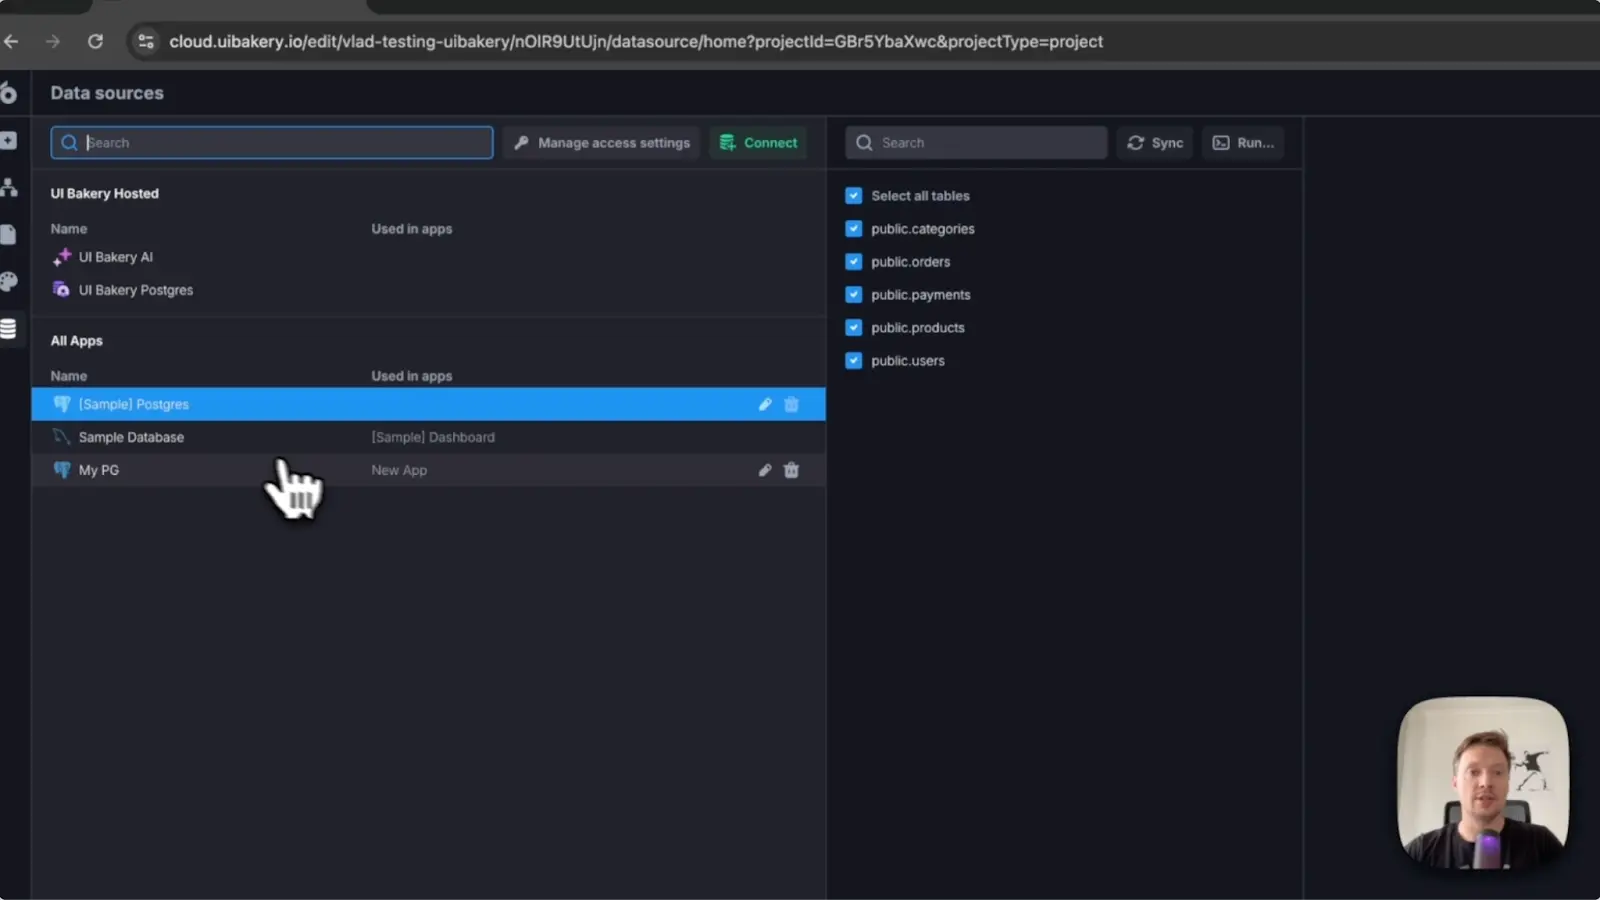
Step 2: Connect your database to UI Bakery
Before we actually start building our Admin application, we need to add the Postgres database as a data source. For that, you need to:
- Click the data source icon in the left vertical menu;
- Connect it using our dropdown menu.
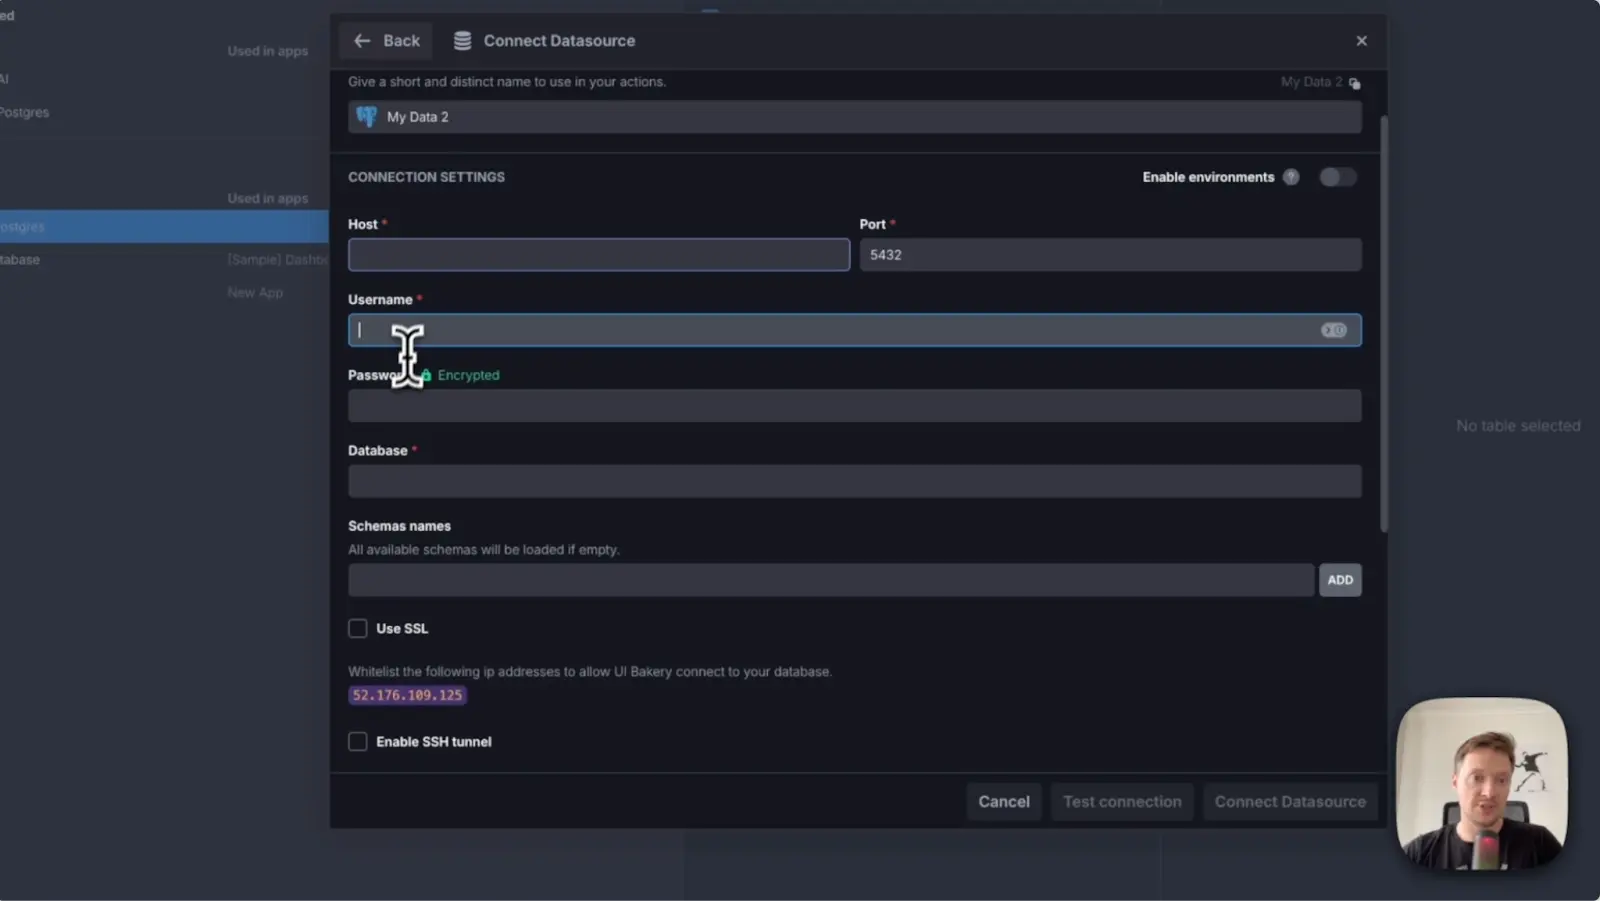
Make sure you filled in all key data, including host, port, username, database and password. This integration will fetch the structure of your database and illustrate it within the builder. And you are ready to go.
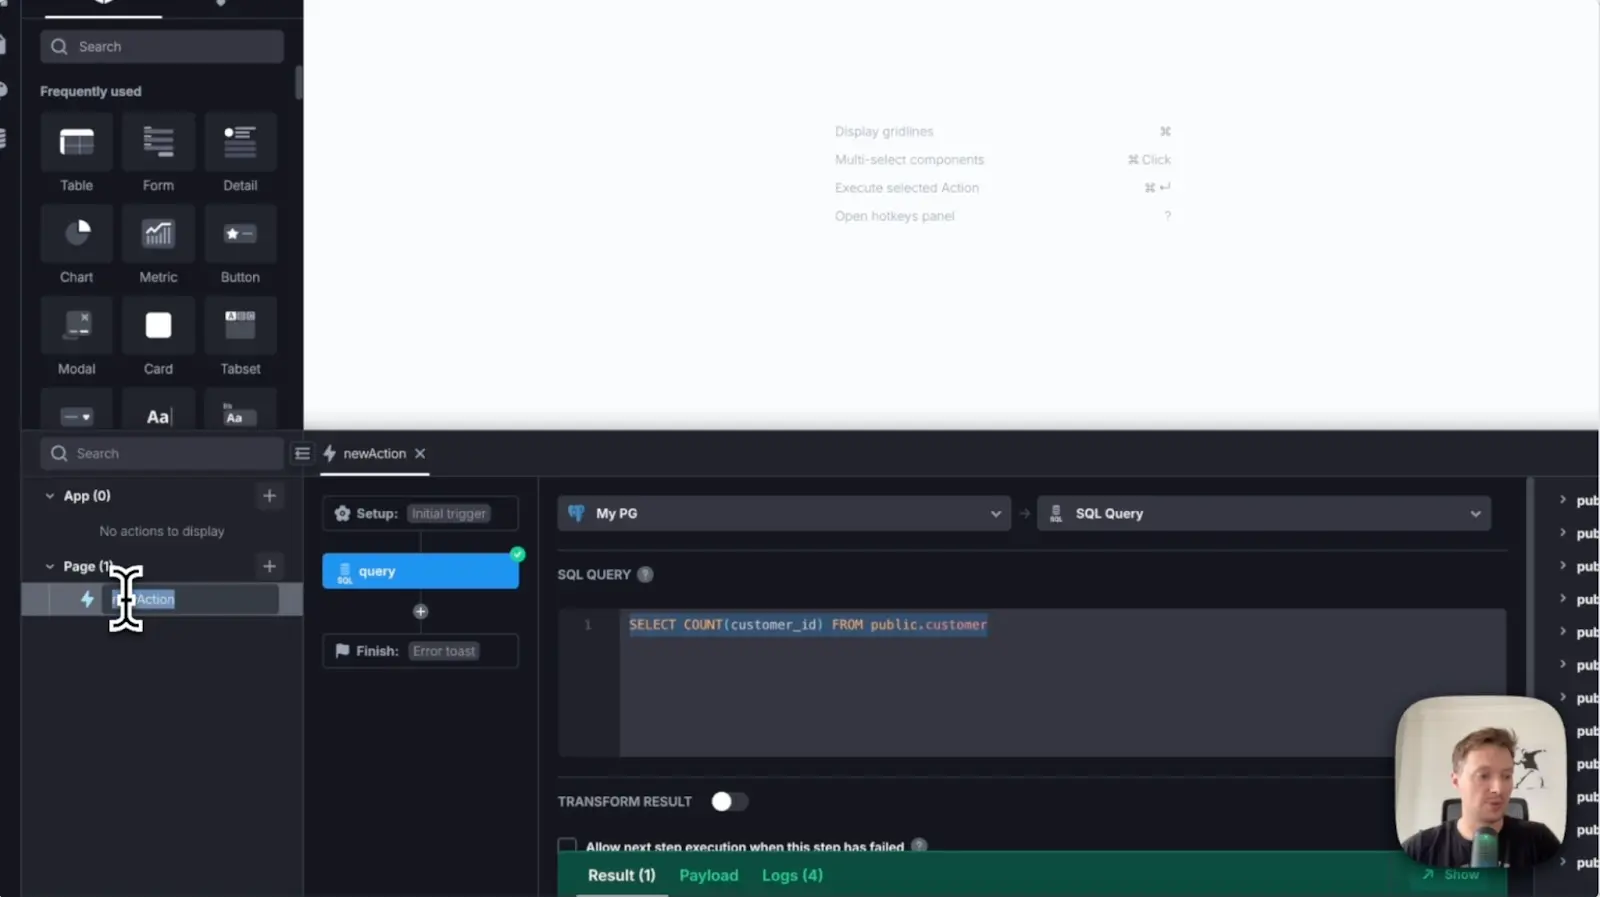
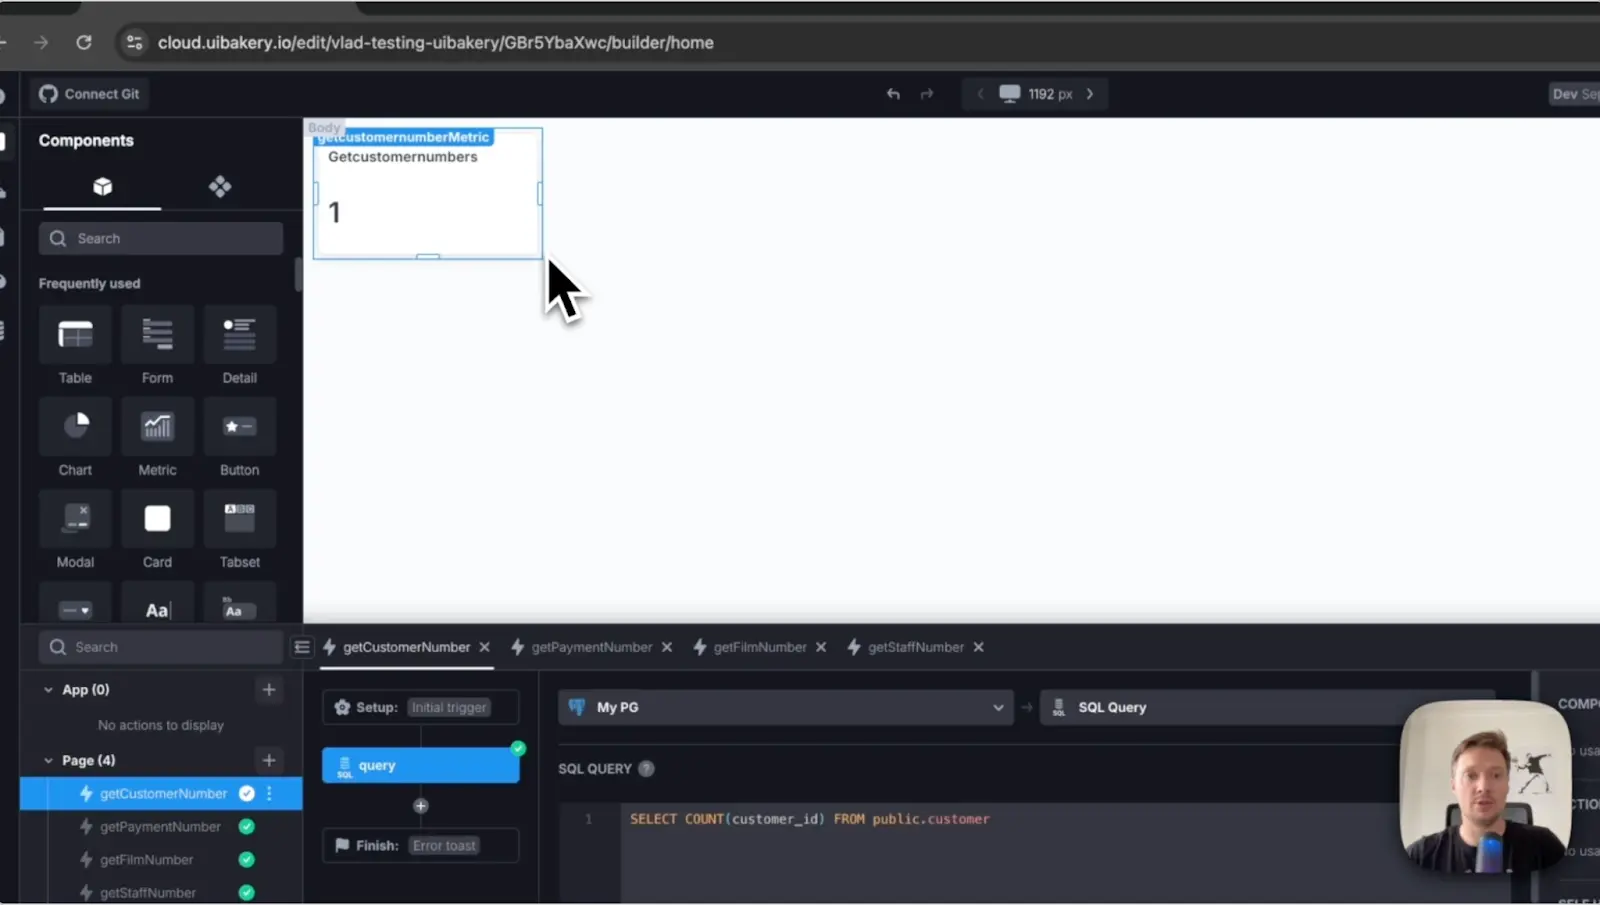
Step 3: Define actions
A classic admin panel typically includes metric cards that display general business performance information. Let's define some actions that would fetch the total number of customers, payments, films, and staff members. Scroll down to find a "Create action" button and click on it.
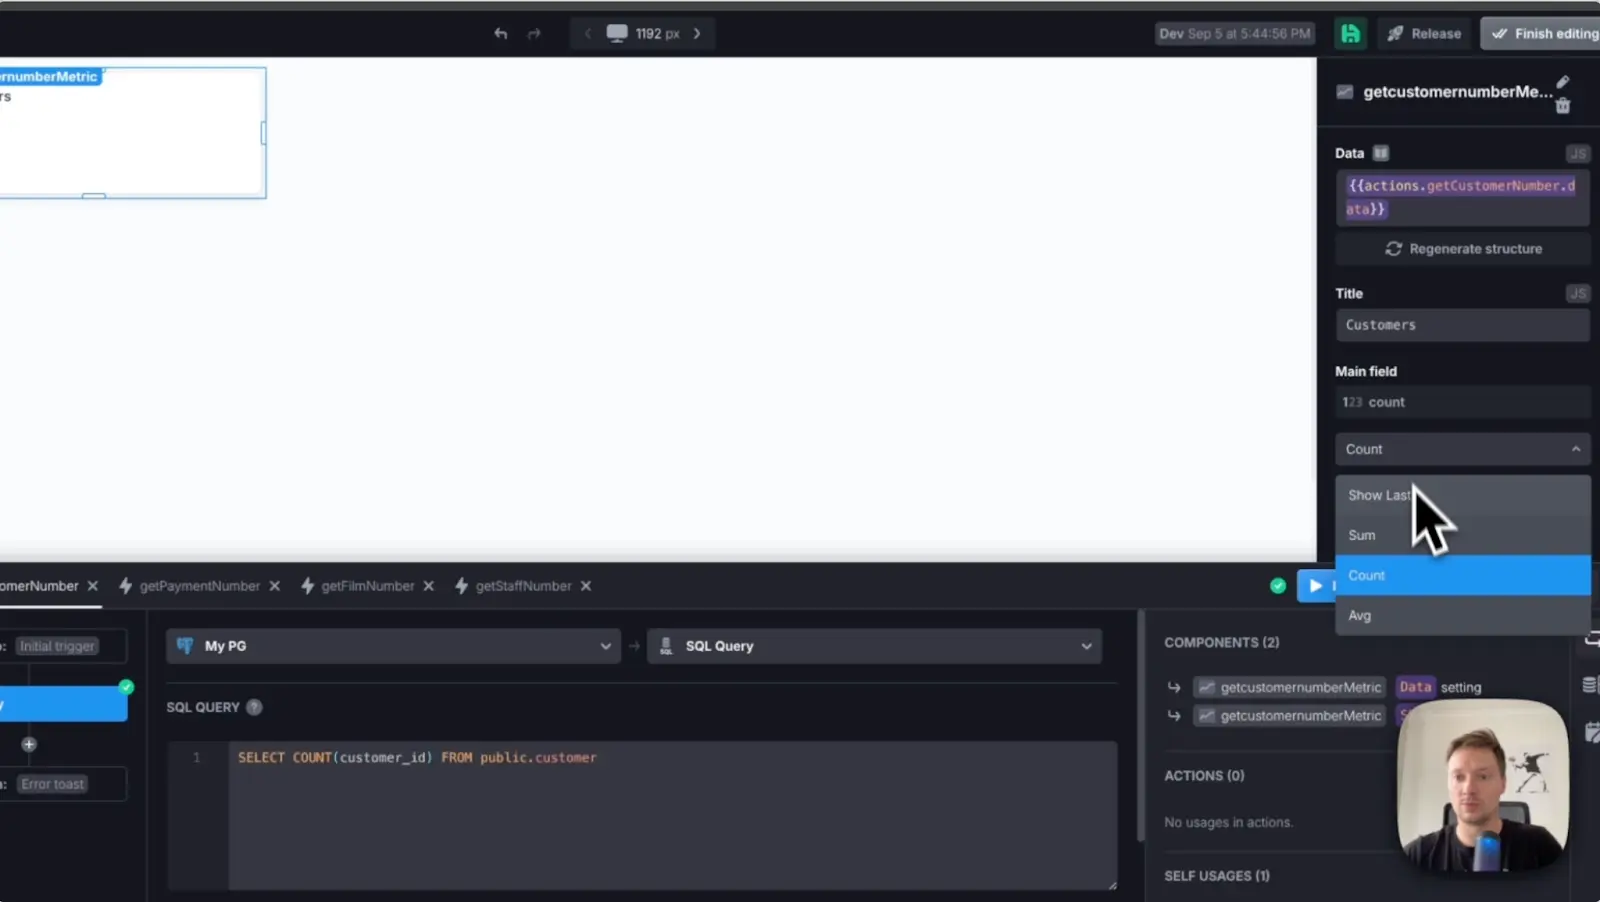
Step 4: Add metric cards
Once actions are defined, it's time to add metric cards by choosing the element in the left menu. First, let's add a metric for customer numbers.
- Go to the right menu.
- Give a metric a name and choose "Show last" in the dropdown menu.
- Then, we can add a metric for payments, films, and staff.
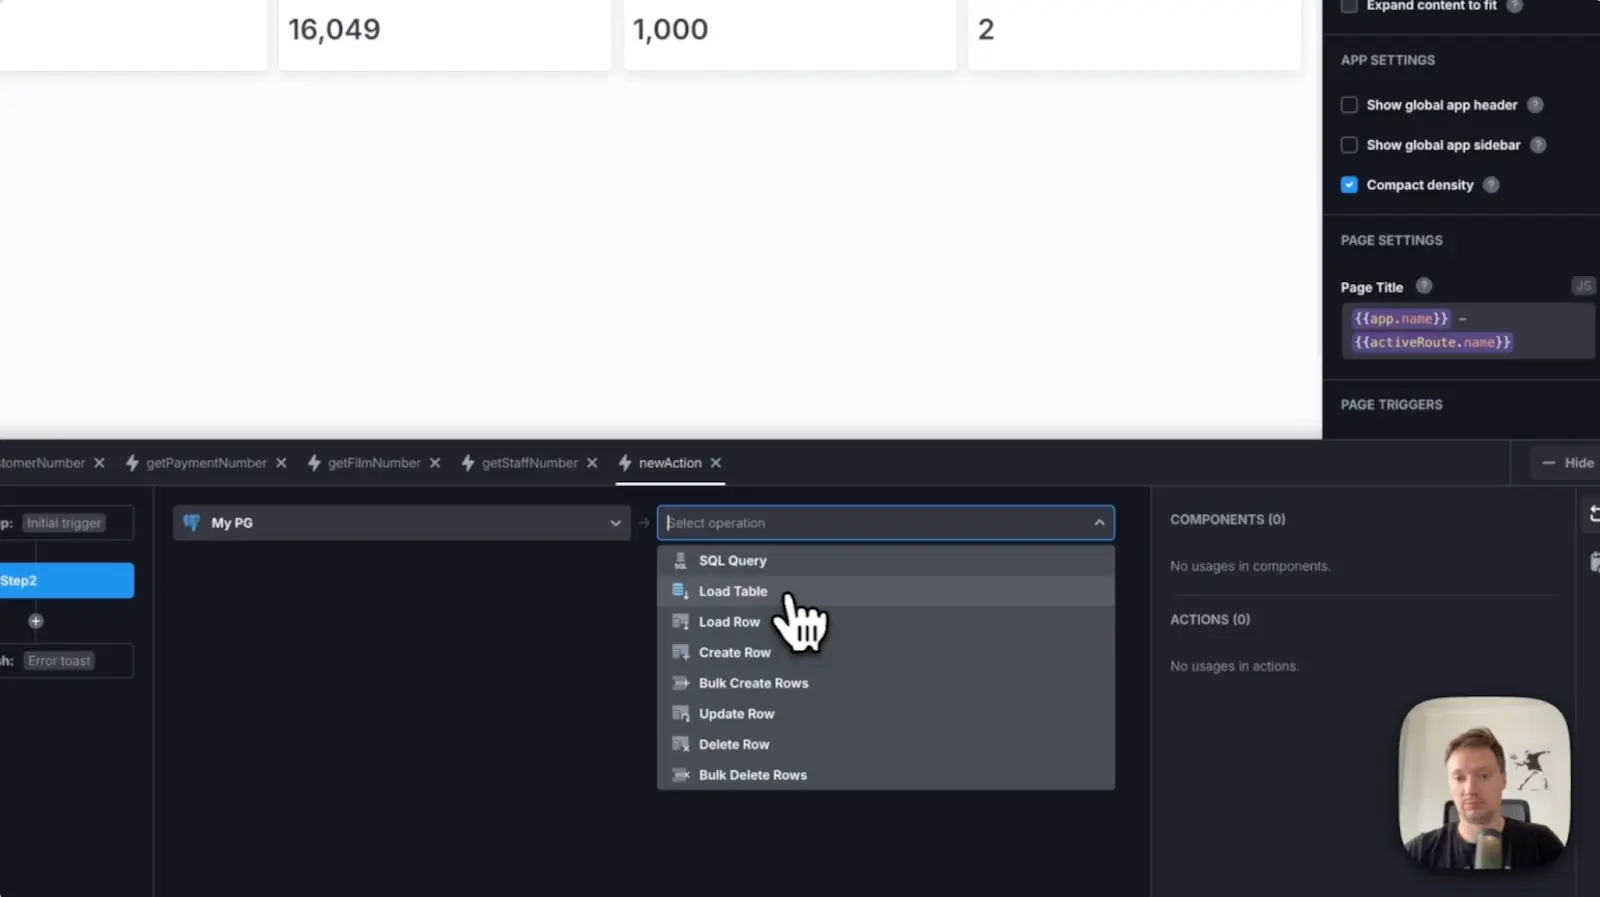
Step 5: Add a table to display customers
When metrics are ready, let's add a table to display our customers. Just like you added an action:
- Go to "Add action."
- Click on your PostgreSQL database.
- Choose "Load table" in a dropdown menu.
Use a dropdown menu to place a table near metrics. The table should already be structured, but you can use a right menu to edit columns and choose what data to display.
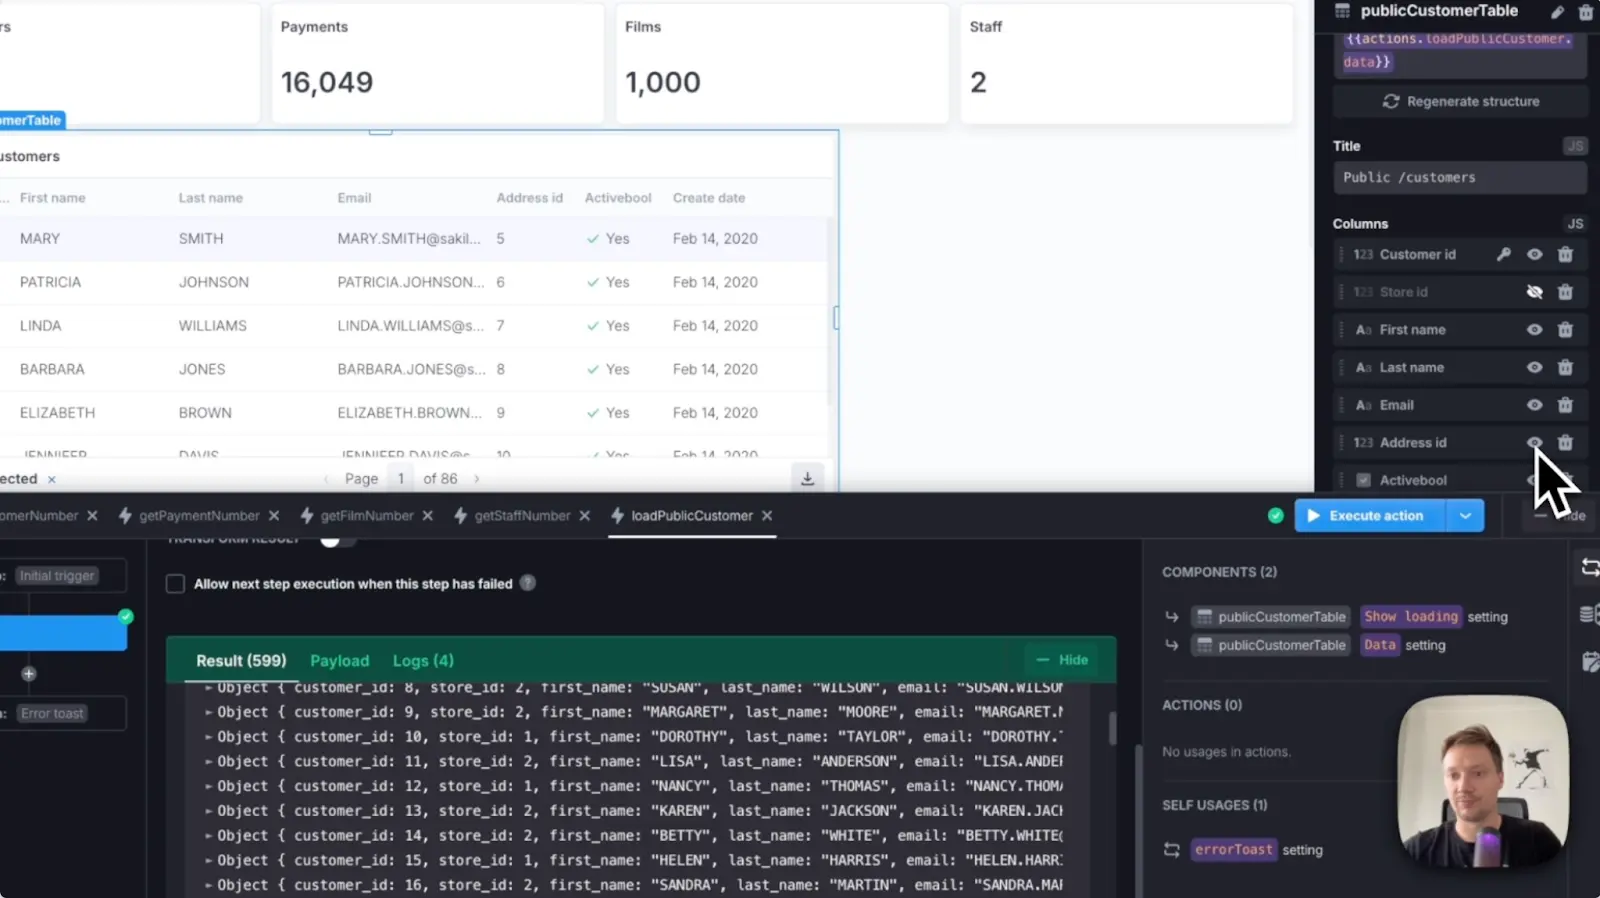
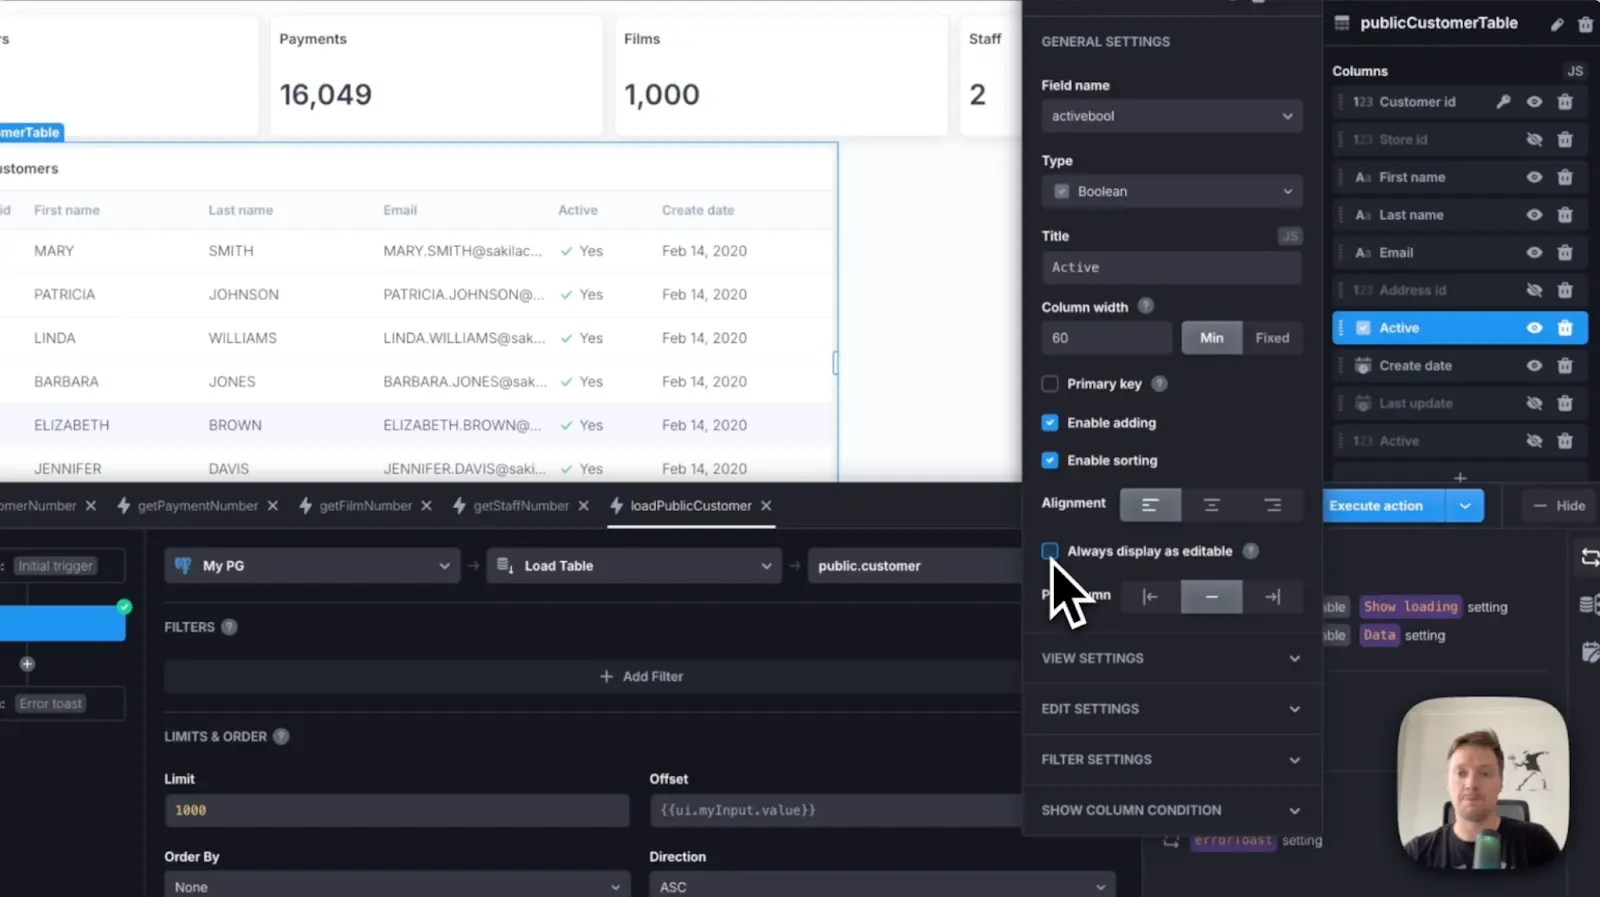
With UI Bakery, you can let your users change all data in the table. But here, we will let them change only the "Active" column:
- Go to the right menu;
- Click on the "Active" column;
- Choose "Always display as editable" in the dropdown section.
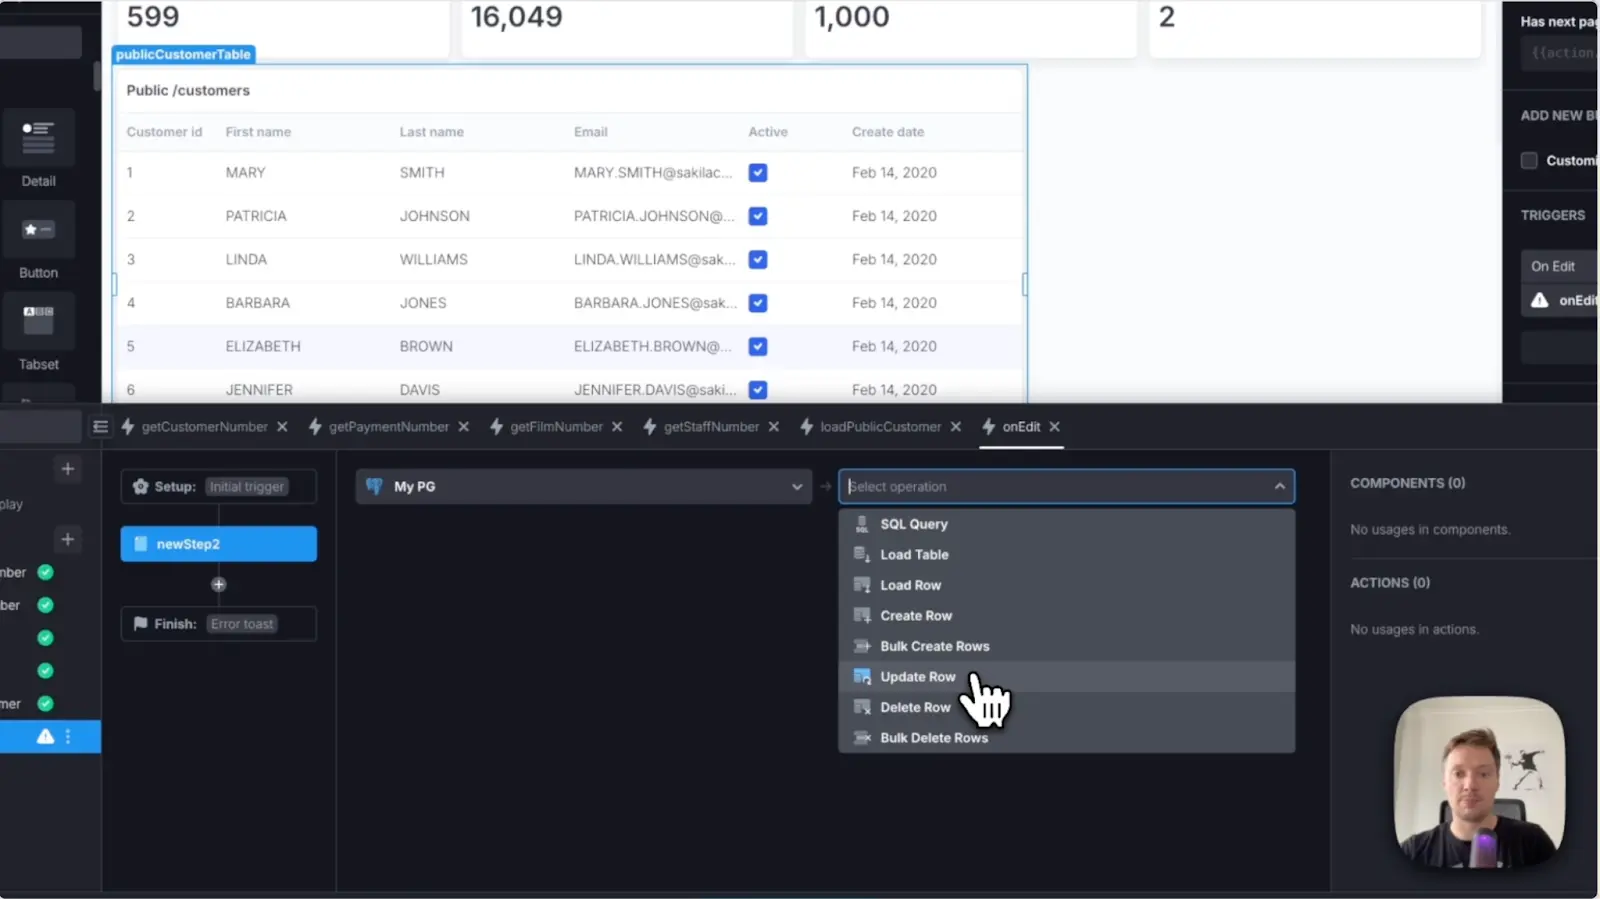
Then, you can go to "Triggers" in the right menu and click on "Add Trigger" to add an action and logic to an editable element.
Step 6: Add data about specific customer payments
Lastly, you may want to display information about specific customer payments as an aggregated chart and a table with corresponding payment records. For that, you should:
- Go back to the "Add Action" section.
- Fetch our payments through PostgreSQL integration;
- Choose "Load table" and then "Payments table."
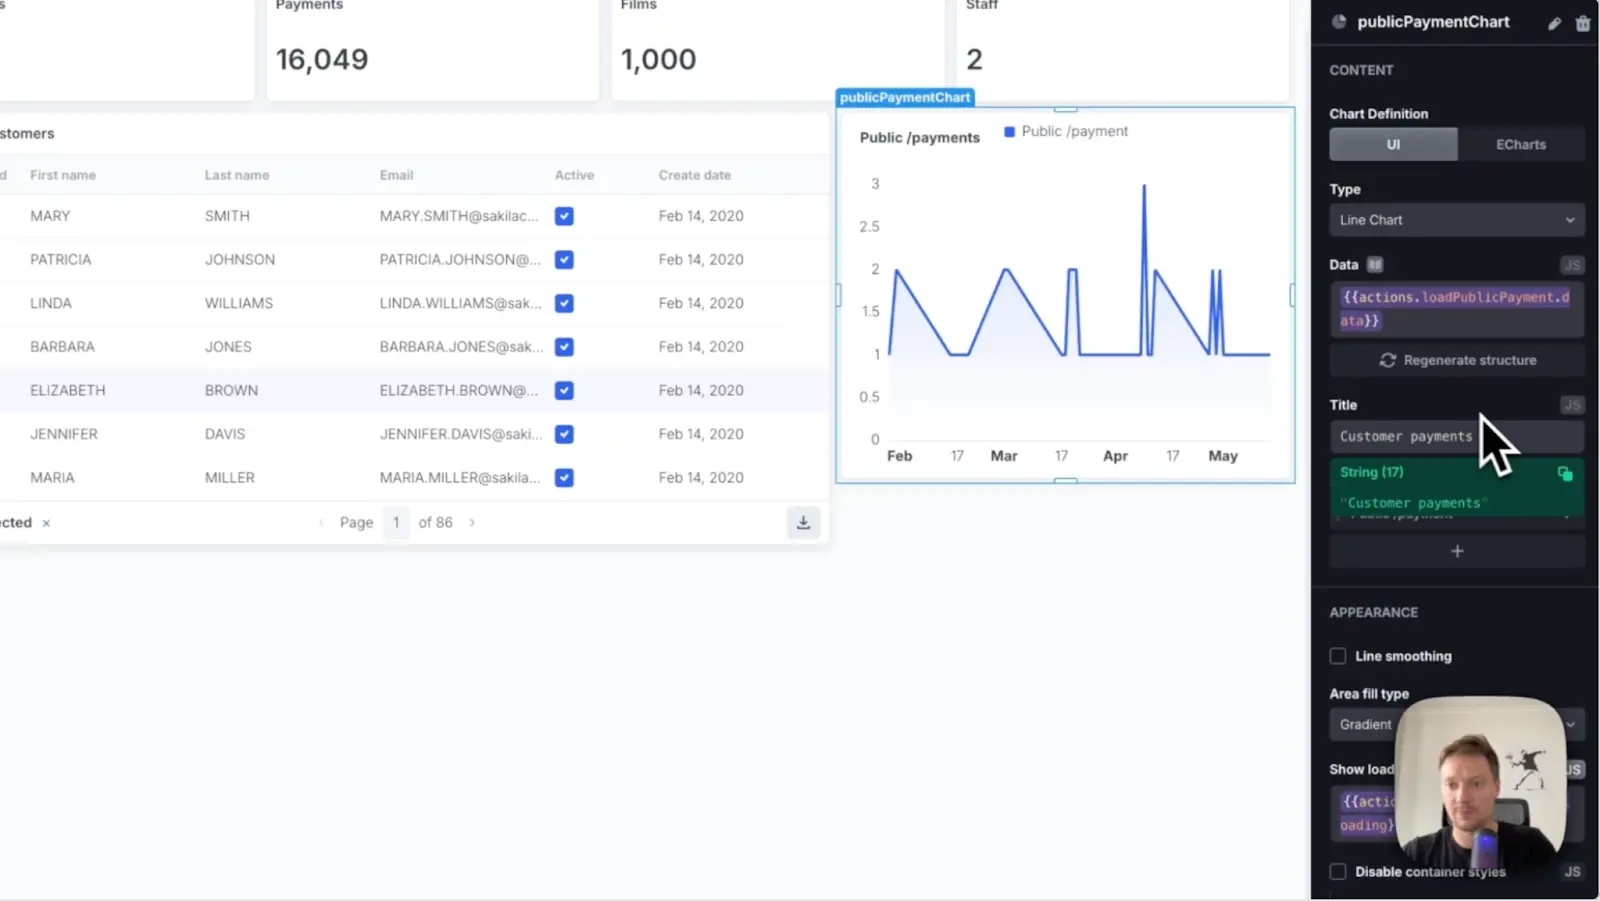
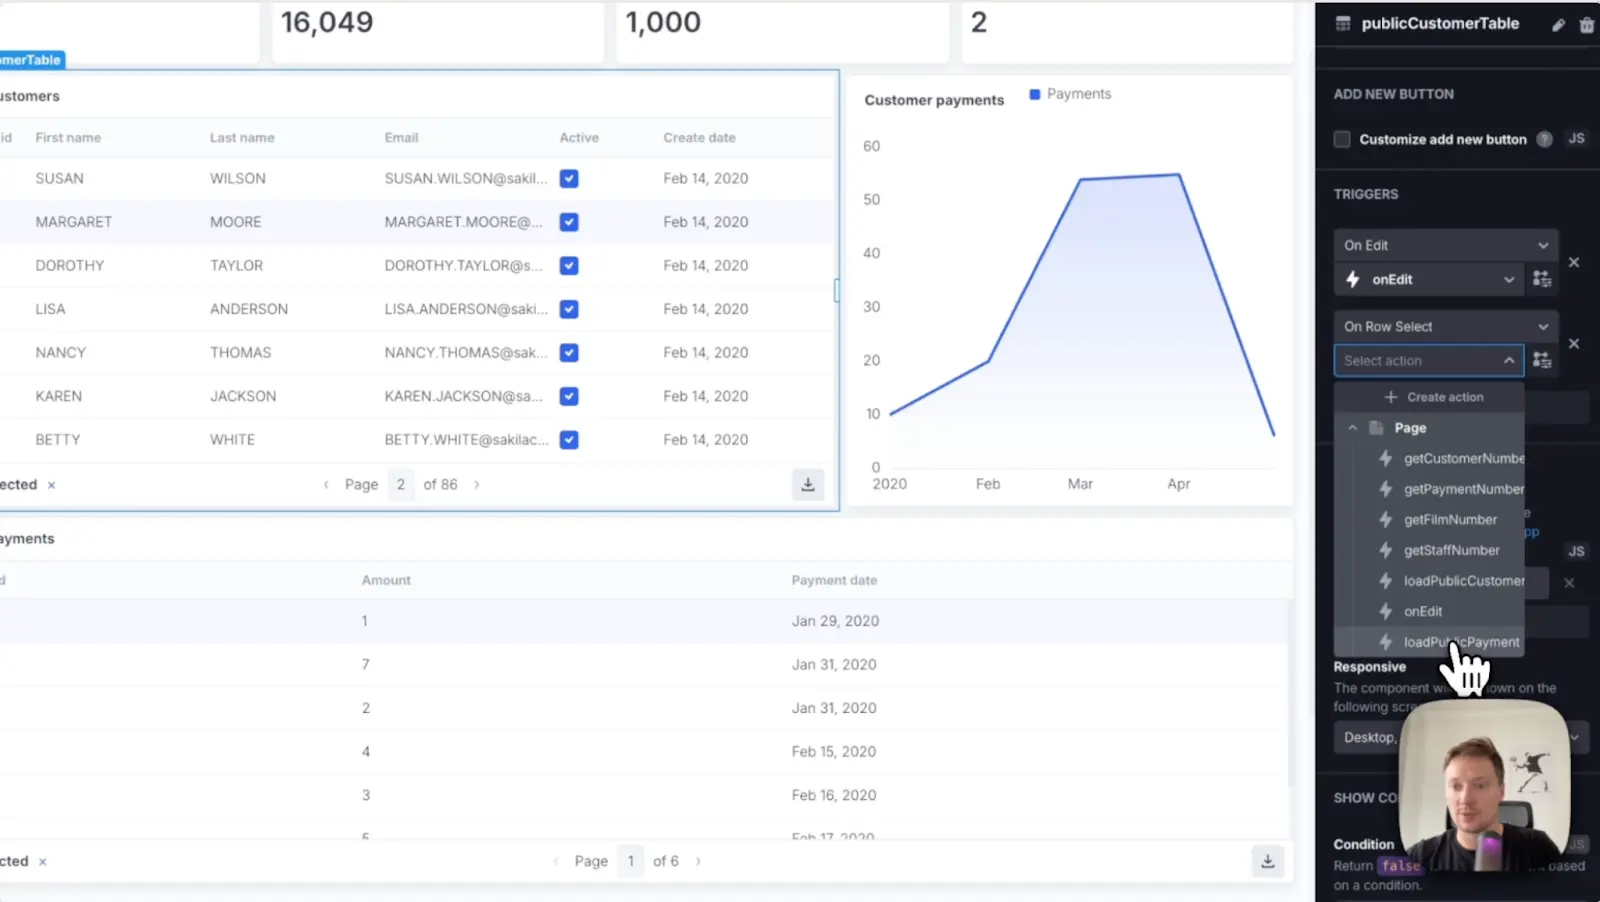
Now, let's add a chart that will represent those payments. Let's call it "Customer payments". We can choose a grouping by month, for example, and show the sum of all the payments here. Resize the chart if necessary so it fits all the other dropped fields.
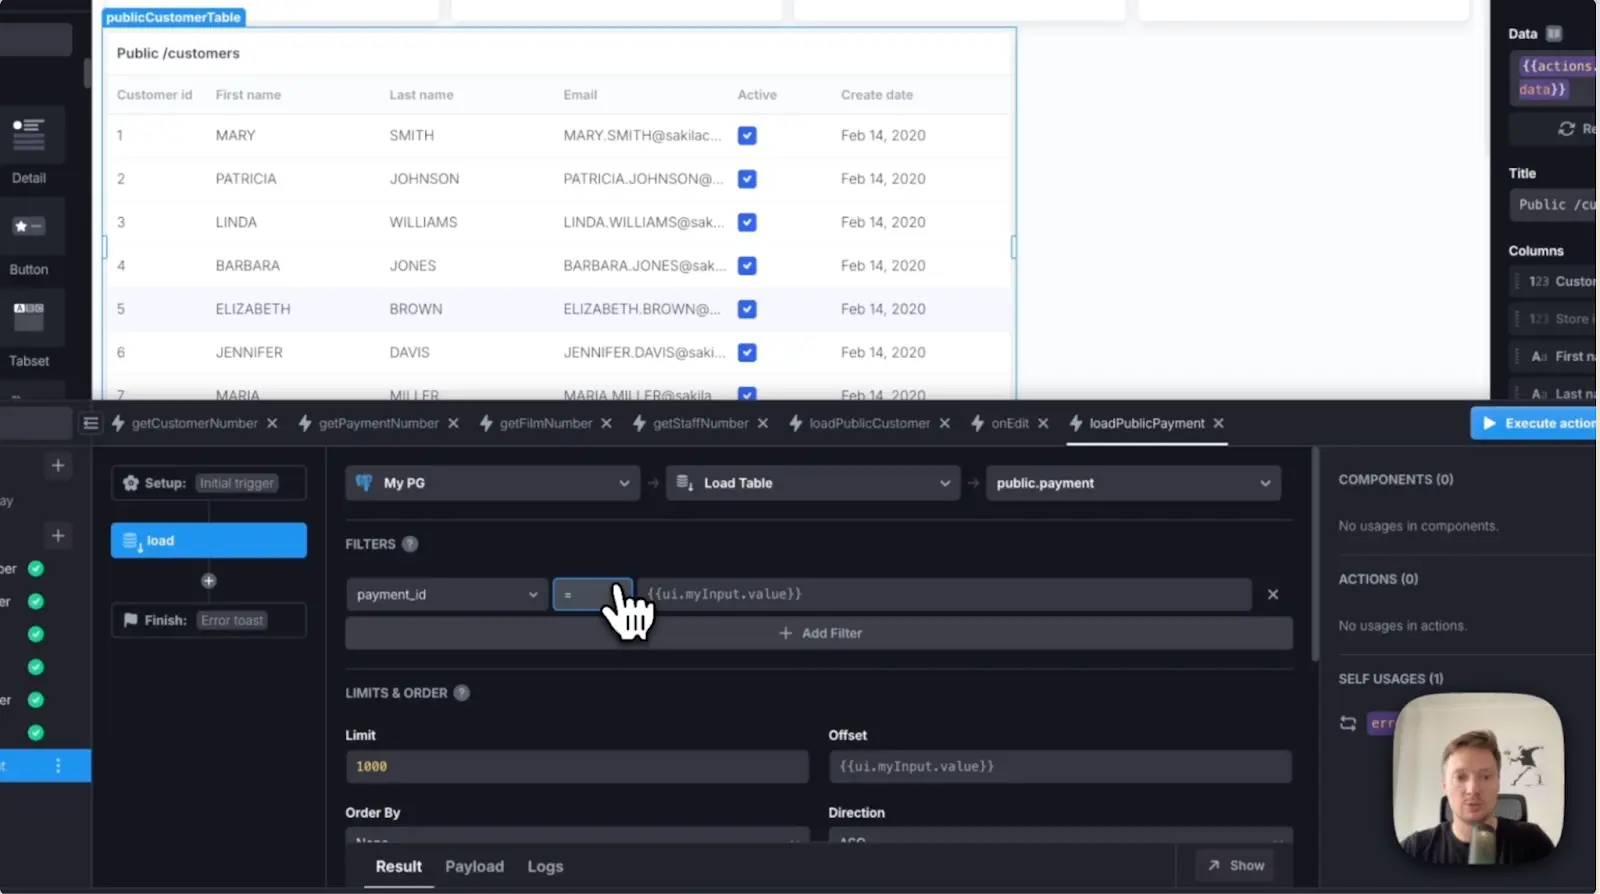
Then drop a table underneath the payment chart of the specific customer payments, you can make the column a primary key, display it without formatting and filter to choose what values to show and hide.
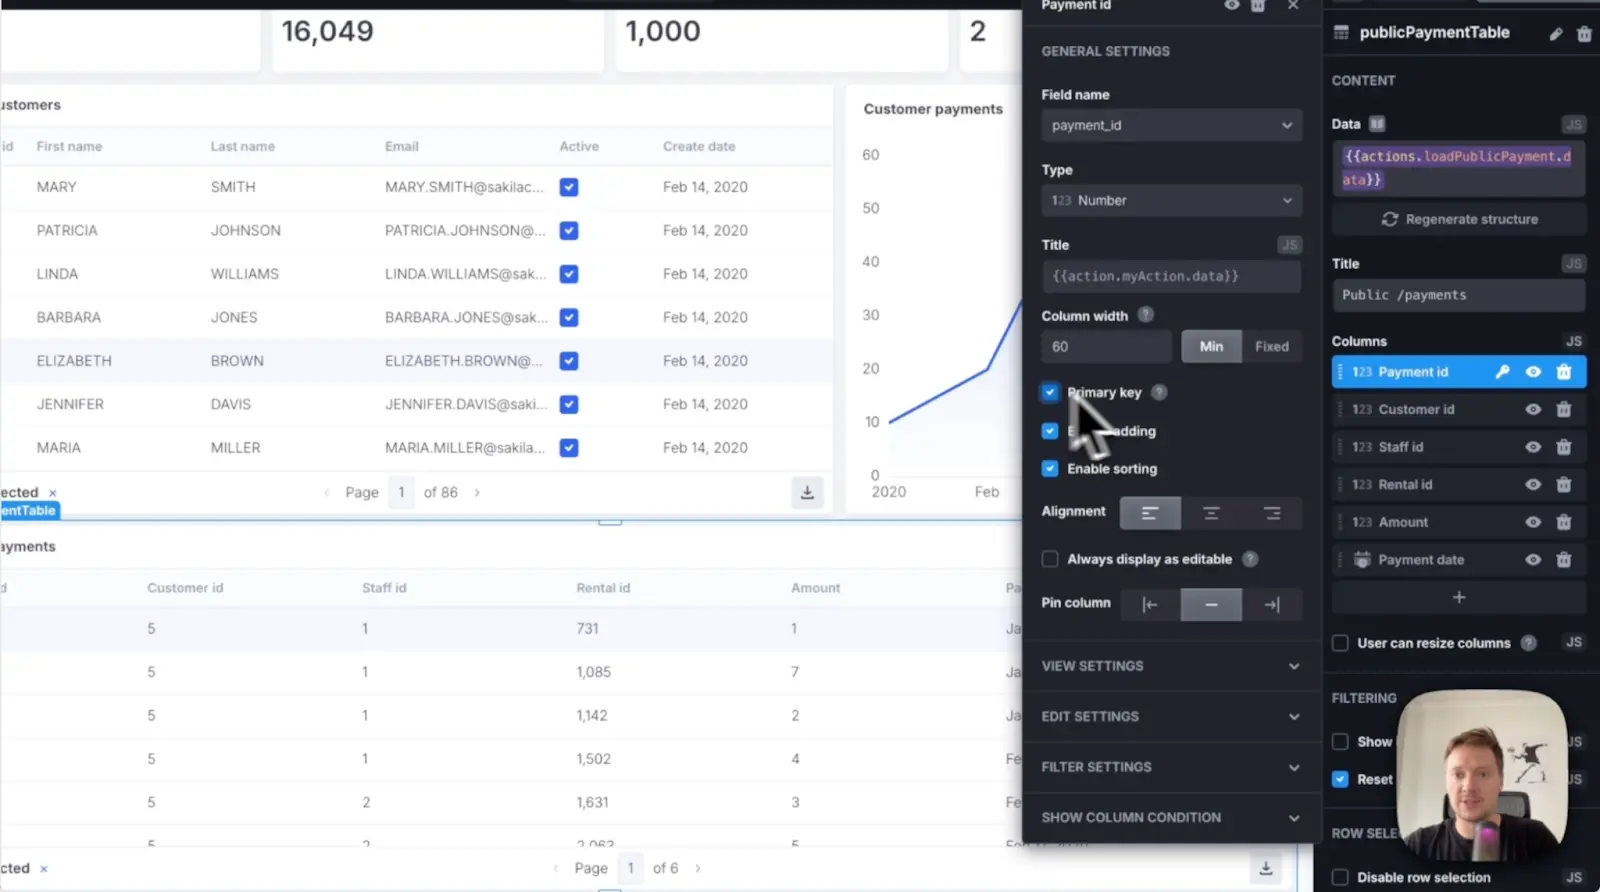
Go to the right menu and click "Add trigger" to execute our load payment action when a row changes.
Once done and data is changing based on chosen values, go to the upper menu and click "Release," → "Publish release"in a drop-down menu, and then "Finish the editing." The app can be accessed by end users who we can invite at the permission section in the left menu.


"The UI Bakery platform offers a cost-effective approach to creating applications. With UI Bakery, you can achieve your app development goals without breaking the bank."

"Before switching to UI Bakery we developed a number of apps within the Retool system. The Retool system was good but ultimately did not have the flexibility and feature sets that we required."
Check the Story